With the cost of groceries skyrocketing over the last several years, I have made it my mission to continue to feed my family of seven a wide variety of nutritious meals on a tight budget. Perhaps the most effective way that we have cut costs has been to cook from scratch as much as possible. I use dried beans, make homemade crackers, cook applesauce in my crock-pot, freeze muffins and cookies, and generally have great success and find very little need for packaged foods. For years, though, one item has proven to be my culinary Kryptonite…
Bread.
Don’t get me wrong – I have tried a seemingly endless parade of recipes, and not all of them were bad. Some were excellent, in fact. However, none of them fulfilled all of my requirements for a great everyday loaf of bread:
- Must slice cleanly without turning into a pile of crumbs.
- Must produce a loaf large enough to feed my family of 7 for at least one meal.
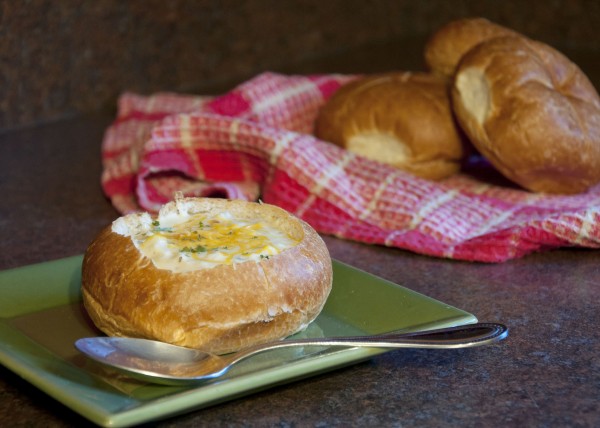
- Must be versatile enough to be toast for breakfast, a sandwich for lunch, and garlic bread to serve with dinner.
- Must be cheap and easy to make. Remember – I have five kids!
I started to believe that I was asking for too much (cough cough) from a single loaf of bread when I came across this recipe on Pinterest. It seemed too good to be true – a beautiful loaf of artisan style bread with just three (okay, four, but water is a freebie!) ingredients and almost no labor involved. My trepidation, however, soon turned to triumph – I had FINALLY found the perfect loaf of bread!
Not only does this loaf of bread take almost no time or effort to produce, it costs less than $1 per (HUGE!) loaf, and holds up beautifully for a variety of uses. We can finally strike “bread” from the grocery list. Give it a try – I promise you’ll be a believer!
Here’s what you’ll need:
- 6 cups sifted all-purpose or bread flour
- 2 2/3 cup cool water
- ½ teaspoon instant or active dry yeast
- 2 ½ teaspoon salt
That’s it. Really.
To Make:
- Combine flour, salt, and yeast in a large bowl.

- Make a well in the center of the dry ingredients and add the water.

- Stir until well incorporated. The dough will be VERY sticky, but resist the urge to add extra flour.

- Cover the bowl tightly with plastic wrap and allow the dough to sit for 12-18 hours. I like to make mine right before starting dinner, and then bake it after breakfast the following morning.

- The dough is ready for the next step when it has risen and is covered in lots of tiny bubbles.

- At this point, preheat your oven and a heavy, oven-safe pot with a lid to 425 degrees.

- Sprinkle the top of your dough with flour and punch it down. Form it into a tight ball, and then wrap in a tea towel. Allow the dough to rise for approximately one more hour while your oven and pot preheat.

- Once your pot is screaming hot and your dough is nice and poofy, carefully plop your dough into the pot using the tea towel.


- Place the lid on the pot and bake the bread for 60-80 minutes or until the internal temp reads approximately 200 degrees, or a skewer inserted into the center of the loaf comes out clean.

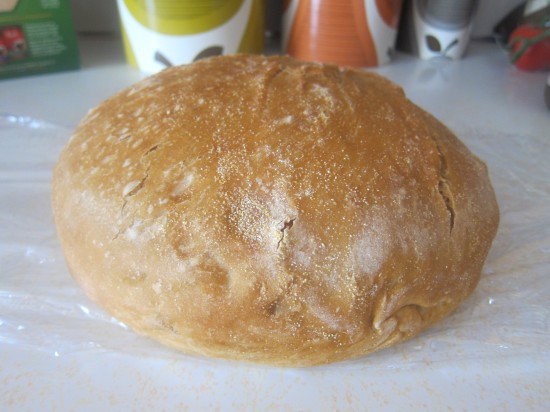
- Remove pot from oven and carefully turn your beautiful loaf of artisan bread onto a clean surface.

Now isn’t that a pretty baby?!
The Perfect Bread
Ingredients
- 6 cups sifted all-purpose or bread flour
- 2 2/3 cup cool water
- ½ teaspoon instant or active dry yeast
- 2 ½ teaspoon salt
Instructions
- Combine flour, salt, and yeast in a large bowl.
- Make a well in the center of the dry ingredients and add the water.
- Stir until well incorporated. The dough will be VERY sticky, but resist the urge to add extra flour.
- Cover the bowl tightly with plastic wrap and allow the dough to sit for 12-18 hours. I like to make mine right before starting dinner, and then bake it after breakfast the following morning.
- The dough is ready for the next step when it has risen and is covered in lots of tiny bubbles.
- At this point, preheat your oven and a heavy, oven-safe pot with a lid to 425 degrees.
- Sprinkle the top of your dough with flour and punch it down. Form it into a tight ball, and then wrap in a tea towel. Allow the dough to rise for approximately one more hour while your oven and pot preheat.
- Once your pot is screaming hot and your dough is nice and poofy, carefully plop your dough into the pot using the tea towel.
- Place the lid on the pot and bake the bread for 60-80 minutes or until the internal temp reads approximately 200 degrees, or a skewer inserted into the center of the loaf comes out clean.
- Remove pot from oven and carefully turn your beautiful loaf of artisan bread onto a clean surface.

If you liked this, you'll love our book, SO GOD MADE A MOTHER available now!
Order NowCheck out our new Keepsake Companion Journal that pairs with our So God Made a Mother book!
Order Now