How exciting to be a part of this new venture, Her View From Home. While my home is in Arizona, I have a strong connection to Nebraska and many close friends in your beautiful state. I am thrilled to provide some budget-friendly home décor tips to HVFH each month and thought the best place to start was the sweet spot in my home where a little life is just beginning – kind of like this site!
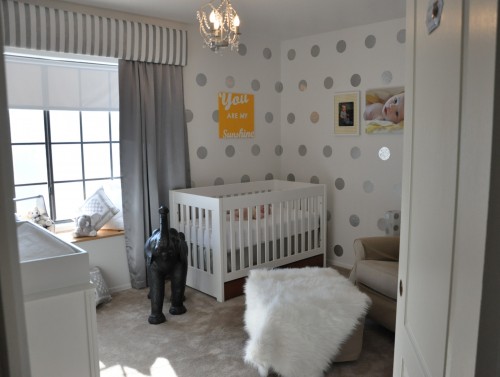
My baby’s nursery is gender-neutral since my husband and I decided to wait and have a delivery room surprise and we plan to use the same room for future bambinos – so we needed something versatile. The nursery started with a blank slate – tan carpets (blah, looking forward to replacing those someday!), freshly-painted white walls and a fun silver and crystal chandelier.
The chandelier is what prompted the silver and white theme – which I later added pops of yellow to for emphasis. Here is the completed room:

By far, the biggest conversation-piece in this room is the wall of polka-dots! Today, I’m going to tell you how I did them myself on a tight budget.

At first, my plan was to order silver polka dot wall decals. However, when the best quote I could find was $220, I knew I would be better off figuring out how to do them myself. I did, and spent less than $40!
Believe it or not, my polka dots are made with silver contact paper from a home improvement store. There, it’s sold in 18-inch by 6-foot rolls in the appliance section. Apparently, people use it to make it look like they have stainless steel appliances. So that’s the first item on the list of what you need for this project – but any color or pattern of contact paper will work.
Project list: Contact paper, circle cutter, credit card, self-healing mat, and something heavy to weigh down the contact paper (I used oversized candlesticks).
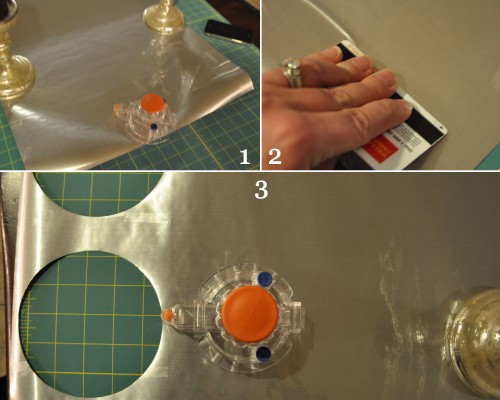
1. Spread the contact paper out atop the self-healing mat and hold it in place with your heavy objects.
2. Gently smooth out any wrinkles with the credit card.
3. Set the circle-cutter to your desired size and cut, cut, cut!
My dots are five inches in circumference (roughly the size of a CD) and I got 39 dots per roll (give or take a few misfires).
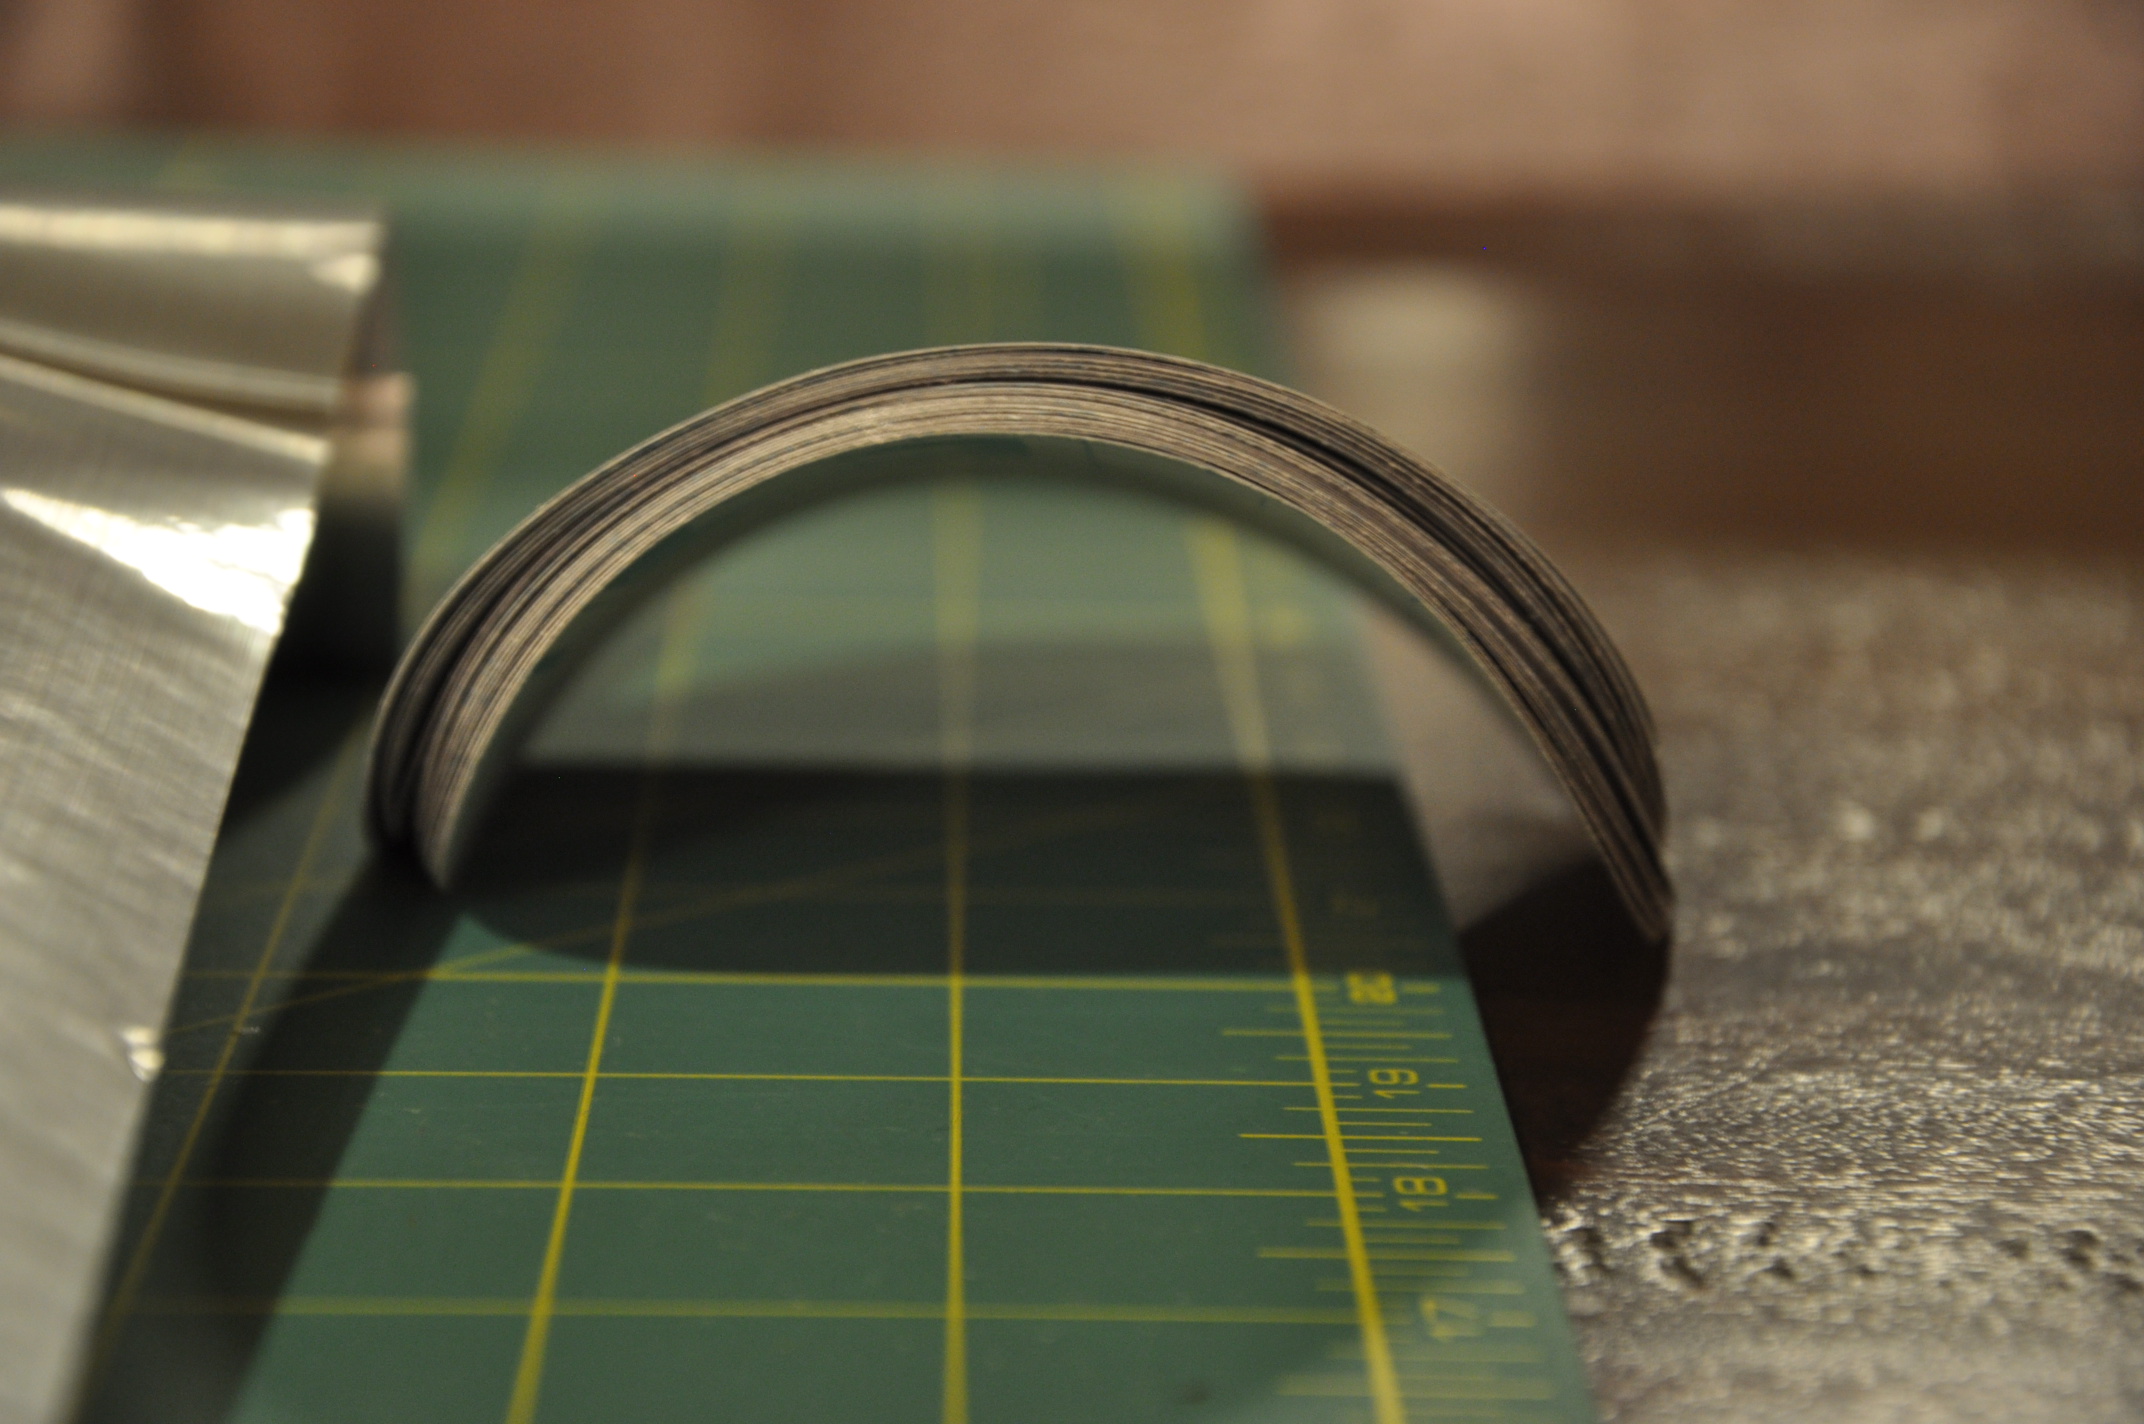
Your pile of cut dots will look like this. Don’t worry about flattening them out.
Once you have enough dots, the next challenge is getting them up on the wall. If you have Type-A tendencies like me, this is a daunting task. If you don’t need the dots perfectly ordered, just slap those puppies up! It will go a lot faster. However, if you want your dots in straight lines, some prep work is in order.
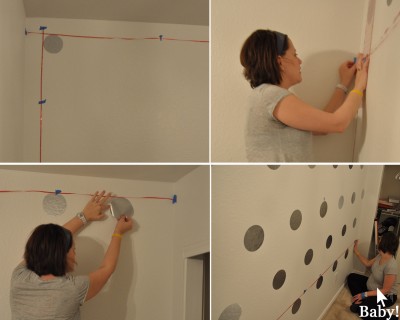
I used Christmas ribbon as my moveable guide – starting four inches off the ceiling and away from the adjoining wall. From there, I set the dots nine inches apart.
For the next row, I measured nine inches from the bottom of the dot above, moved the ribbon for guidance, and set the dots directly between the dots above. I repeated this careful pattern for each row, so that I wound up with seven perfectly aligned rows. Good thing or I would have literally lost sleep over it!

What I didn’t lose sleep over was the budget! The heavy objects and credit card are things you probably already have. In my case, I also already had a self-healing mat. So, I just needed two items:
• Silver contact paper, $9.99 for each 18-inch x 6 feet roll (I used three, but ended up with twice the dots I actually needed) = $29.97
• Circle cutter, I scored one with a half-off coupon at a craft store = $9.99
TOTAL = $39.96 (that’s a $180.04 savings from the pro’s quote!) Connect the dots… I’m a happy momma!
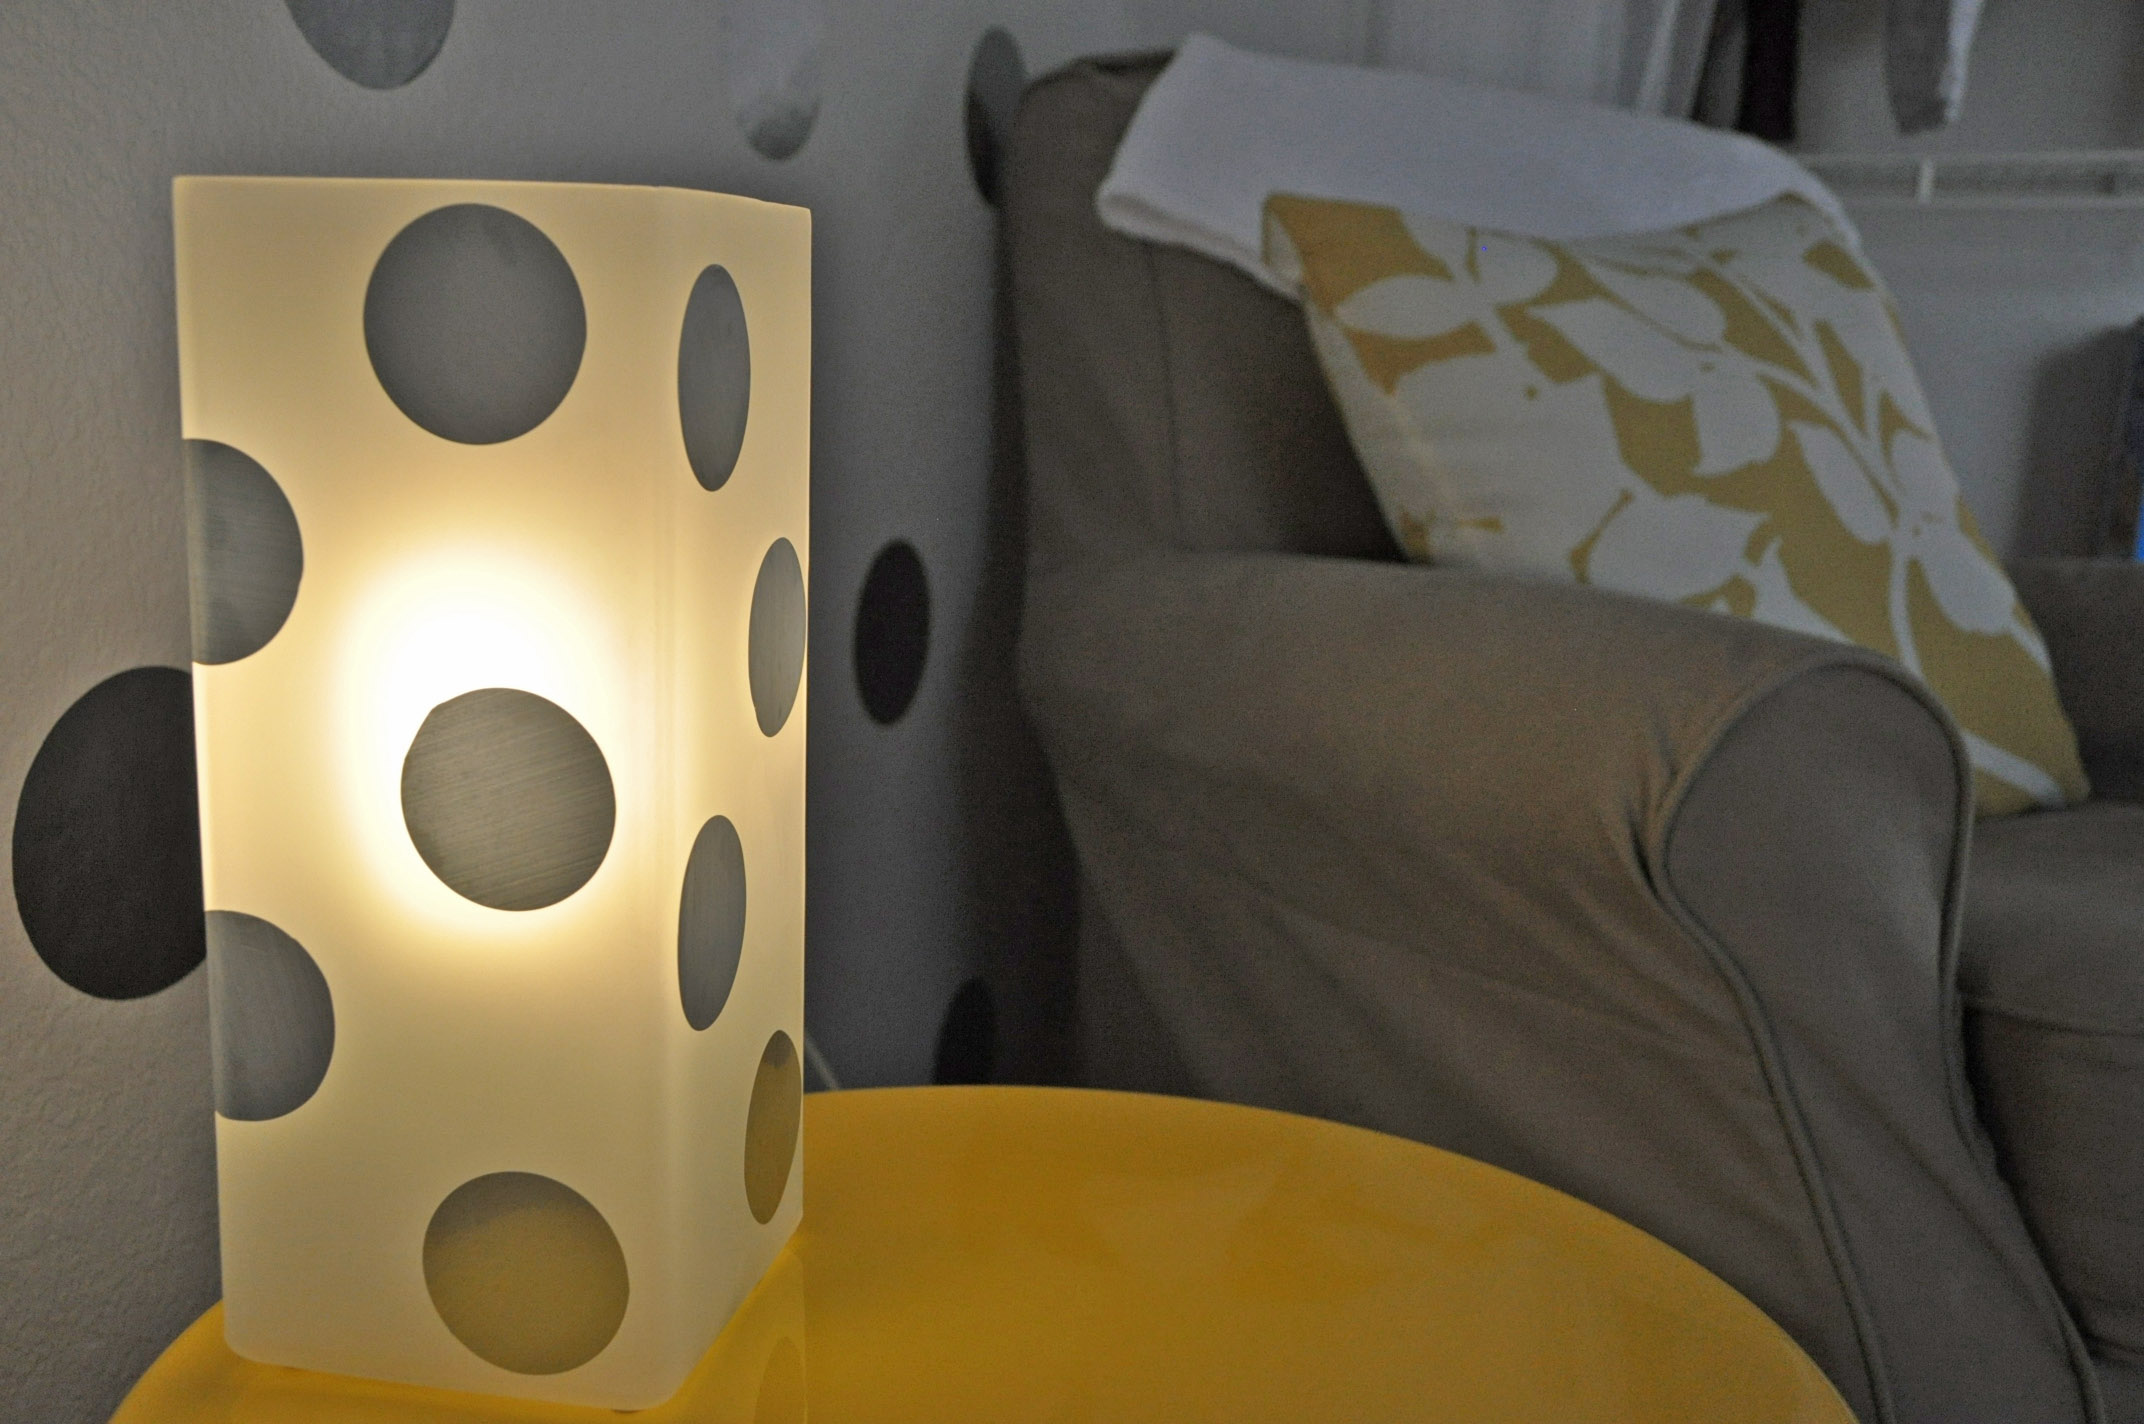
With some of my extra dots, I reset my circle cutter to a smaller size and cut smaller versions of the polka dots to decorate a lamp I had lying around. It was fun to add the polka dots to another piece in the room for absolutely no additional cost!
My son is now ten months old and the dots are holding up perfectly! Good thing as he’ll become a big brother in October and the baby – who will be another delivery room surprise! – will be inheriting this room and the dots.
Anyone inspired? If you replicate this project, please post a link below and let me know how it turns out. Be sure to check out my blog for more DIY home ideas.